There are two ways to share pages with friends in DigitalPage.
1. Send page
You can share pages with DigitalPage users. Here’s how.
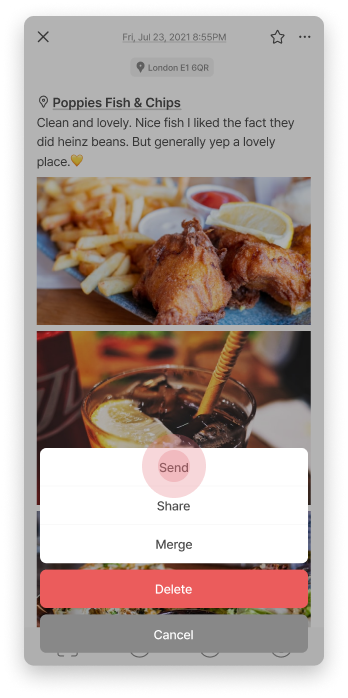
On the page view screen, press the button on the upper right corner.
Click the "Send" button.
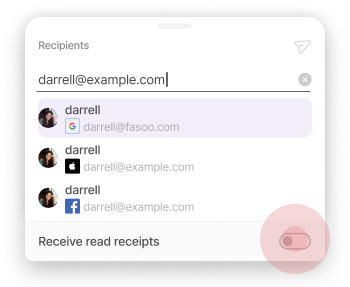
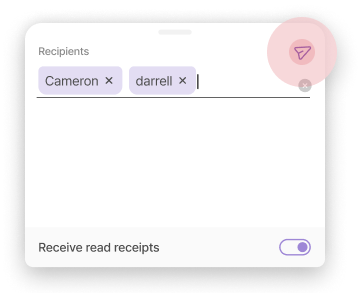
Enter the recipient's email address. You can add multiple emails.
To check if the page you sent has been read by the recipient, turn on the "Receive read receipts" option and send. When the other person reads the page, you can receive a read receipt notification.
Click the "Send" icon to send the page.
In the page information, you can check who the page was sent to and who has read the page.
2. Share your page
You can also share your page with friends who are not yet members of DigitalPage. Here’s how.
On the page view screen, press the button on the upper right corner.
Click the "Share" button to choose a third-party app to share with.